In ShowSim, all the drag-dropping operations occur between the Effect Browser panel and either the Time Line or Script Editor windows, so you’ll want to work with all three of these windows open. You actually don’t drag-drop onto the position markers on the simulation screen, so if you are used to Finale this will be different for you. You can still select the position markers in the simulation area as a means of specifying which positions are to be used when creating new cues, you just don't use them as the target point for drag-drop operations. You still might want to view the simulation area while scripting though in order to see previews of effects that are selected in the Effect Browser. Having a second monitor is really the best setup to work with since it allows you to put the three working screens on one monitor and then have the simulation area be on the second monitor, otherwise you can resize the Script Editor to allow a portion of the simulation screen to be visible, then adjust the viewpoint in the simulator so that effect previews can be seen in that region. With smaller sized monitors being so cheap now, even laptops can be converted to dual-monitor setups using USB to RGB adapter cables without spending much money.
The most common methods of placing effects are described below.
1) Cue Drop Mode
Cue drop mode is a recording mode for dropping cue markers in real time while the music is playing. There are no effects placed on these cues, they are just empty place holders to be loaded with effects later. The benefit of using cue drop mode is that the music can be used as a guide for cue placement. Often it is not possible to really tell what point in the song you are at by looking at the music data graph, and hitting play and stop repeatedly to get to certain positions would be tedious. Thus cue drop mode lets you drop cues instantly without stopping the music.
A recording session in cue drop mode is started by pressing the button on the timeline that has a round dot on it, as seen in Figure 1. Once the session is running, one blank cue will be dropped at the current play position every time the space bar is hit. When the recording session is complete, click the Stop button to stop the show and end the recording session. The Script Editor can then be used to drag-drop effects on to each cue with the “Drag-Drop = Replace” setting checked in the Options drop down menu of the Script Editor. When dropping effects onto the Script Editor from the Effect Browser in this mode, all effects assigned to each cue selected in the script grid will be replaced by the new effect. If the Replace option is not checked, then dropping effects on the Script Editor will result in new cues being created that contain the effect, which is not what you want in this case.
2) Drag-Drop onto Script Editor
The Effect Browser is like your palette of fireworks effects to use when building a show. This is your window into the thousands of simulation effects stored in the database, and it is designed to be highly searchable to quickly narrow down the listing in order to find exactly what you are looking for. Once the effect you are looking for is displayed in the listing, you can use the mouse to drag it from the list and drop it onto the Script Editor.
When drag-dropping an effect onto a cue in the script, there are two modes of operation. In one mode, the dropped effect will create a new cue which will be placed at whatever the current show time marker is set to. In the other mode, the dropped effect will be applied to whichever cues are selected in the script and will replace whatever is currently on them. To use this second mode, open the Options drop-down menu on the Script Editor and make sure “drag-drop = replace” is checked. When dropping the effect onto the Script Editor grid, it is not necessary to drop it on any specific row, since the dropping action will always be applied only to the selected rows. So you can drop it anywhere on the grid to get the job done.
3) Drag-Drop onto Time Line
You can also drag effects from the Effect Browser directly onto the Time Line, which will display a moving cue marker and time stamp that follows the cursor as you move it. The advantage of this method is the time stamp allows you to see exactly what time the effect will be placed at before releasing the mouse button. When the mouse button is released, a new cue containing the selected effect will be created at the drop point.
4) Double Click on Time Line
You can also double click on the Time Line to place whatever effect is selected in the Effect Browser. This is useful if you have to create a bunch of cues containing the same effect over and over, rather than having to keep going back and dragging the same effect over again. You can always adjust the time of the cues by dragging them with the mouse after they have been placed.
5) + Buttons on Effect Browser
The “+ Cue” button on the Effect Browser will create a new cue at the active show time (time where the yellow line appears on the Time Line) and place the effect selected in the Effect Browser on that cue. The other + buttons on the Effect Browser operate on selected cues in the Script Editor, so the Script Editor must be open for them to work. The +Bucket button will add the selected effect as a new bucket on the selected cues, while the +Effect button will add a new effect to the selected bucket of a cue. In order to select a bucket on a cue in the Script Editor, the detail view for that cue must be expanded by clicking the small arrow icon that appears in the first column of each row. An example of an expanded cue can be seen in Figure 5. The +Bucket and +Effect buttons can be used to build chains of effects that are all to be fired on a single cue.
6) Add Button on Script Editor
The Add button on the Script editor will add an empty cue just like the cues created in cue drop mode. You will then need to populate the empty cue with effects once it is created.
7) Drag-Drop from Clipboard
If you select a group of cues on the Script Editor and click the Copy button, those cues will be placed on the Clipboard. You can then drag-drop from the clipboard onto the Script Editor or Time Line just as you can from the Effects tab. You can also use the Insert button on the Script Editor to copy the entire contents of the Clipboard to another point in the show. The insertion point will be the active show time indicated by the yellow line on the Time Line. The Clone button will make an exact copy of whichever effects are selected, so only use that one when you want the copy to appear in the same location as the original. The Replace button will take the contents of the Clipboard and overwrite the contents of any selected cues in the Script Editor.
8) Drag-Drop from Inventory Browser
For versions of ShowSim that have inventory functionality, the Inventory Browser can also be used as an effect source for drag-dropping and works just like the Effect Browser.
Page 1
|
|

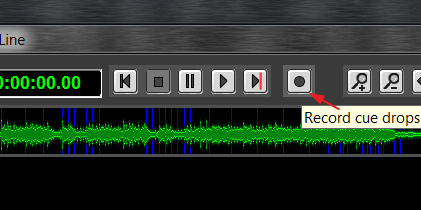
Figure 1:
The button on the Time Line used to begin a cue drop recording session.
Figure 1:
The button on the Time Line used to begin a cue drop recording session.
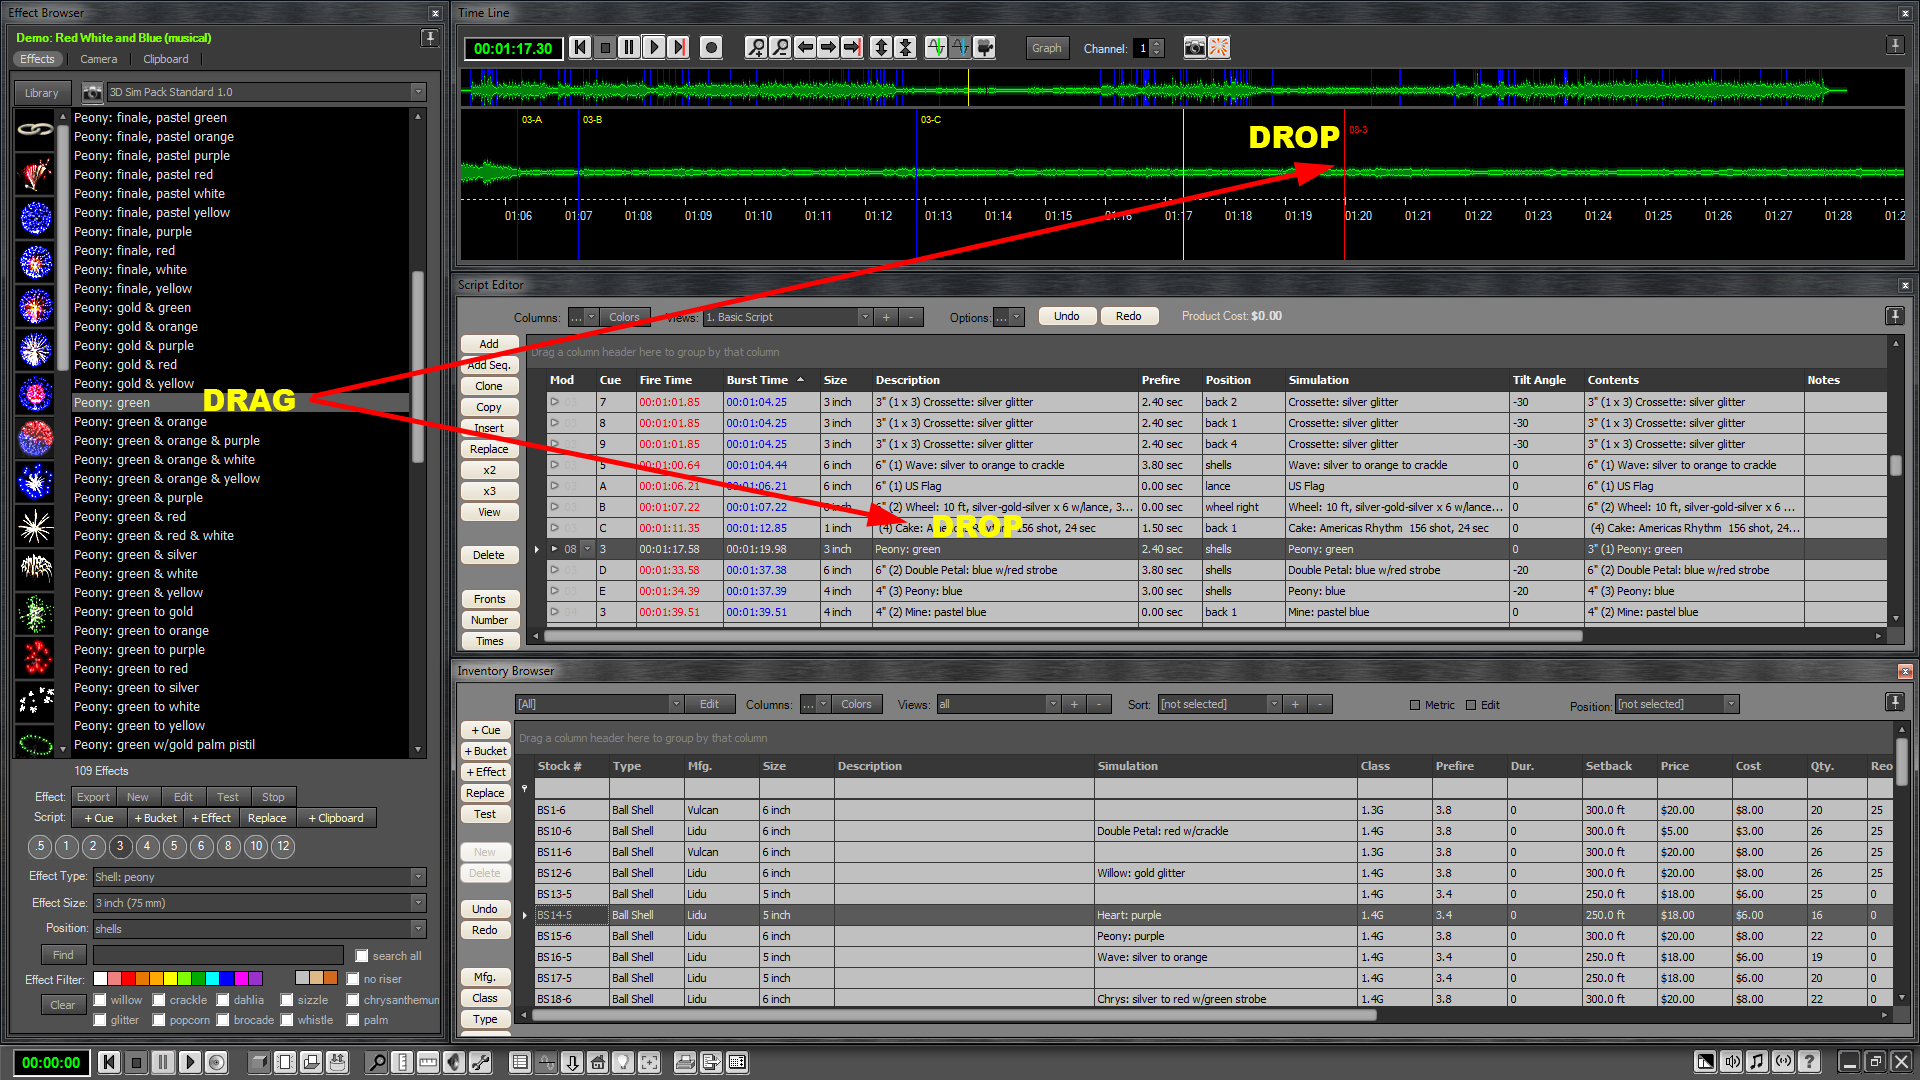
Figure 2:
Drag-drop paths from the Effect Browser
Figure 2:
Drag-drop paths from the Effect Browser

Figure 3:
Time stamp and cue marker seen when drag-dropping an effect onto the Time Line.
Figure 3:
Time stamp and cue marker seen when drag-dropping an effect onto the Time Line.

Figure 4:
+ buttons on the Effect Browser
Figure 4:
+ buttons on the Effect Browser

Figure 5:
An expanded cue showing the detail view containing three effects that will fire at the same time.
Figure 5:
An expanded cue showing the detail view containing three effects that will fire at the same time.
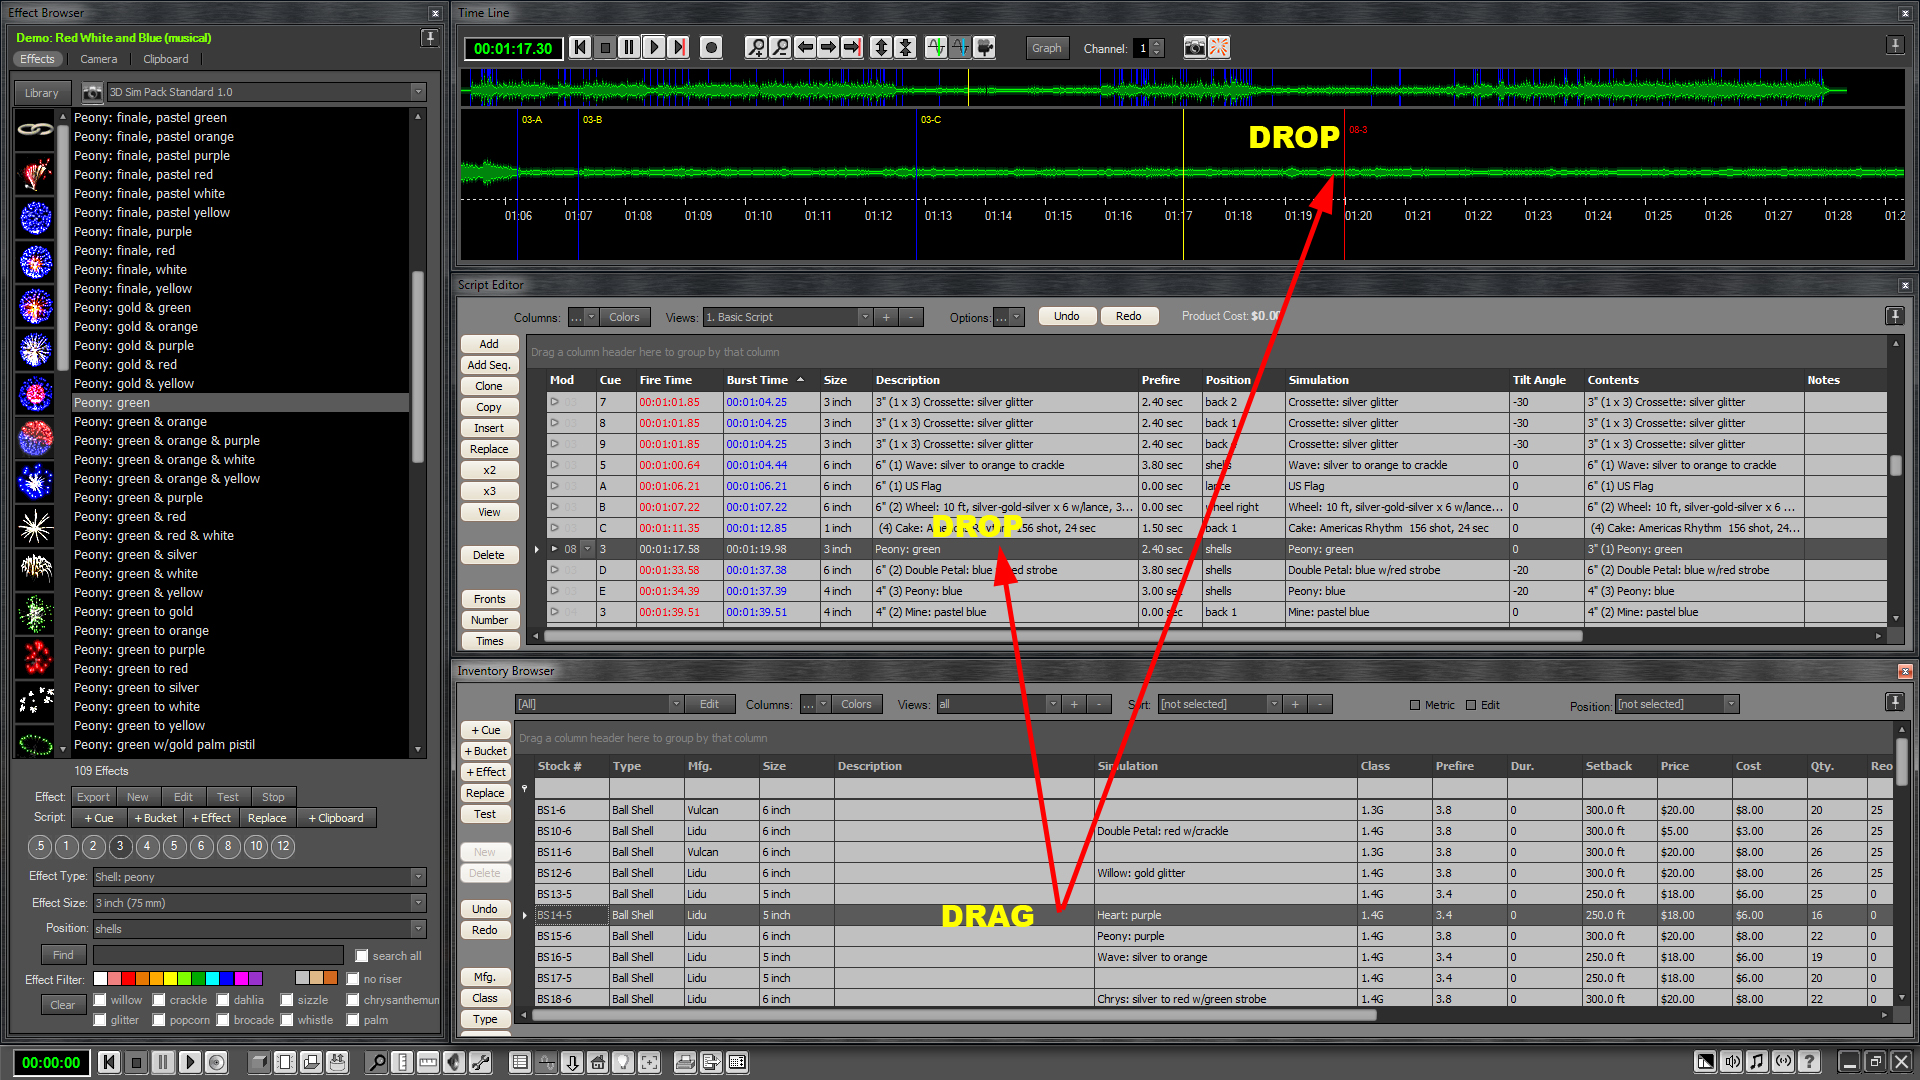
Figure 6:
Drag-drop paths from the Inventory Browser
Figure 6:
Drag-drop paths from the Inventory Browser
|
|