Cakes are modular packages that contain multiple effects fired in a timed sequence. The effects generally consist of shells, comets and mines but may also include gerbs, spinning inserts, whistle rockets, parachutes or pretty much anything that can be fired from a tube. Because of their complexity and infinite variety, cakes are the most time consuming effects to create simulations for in ShowSim. The process of designing a cake simulation usually begins by first finding a video on youtube or the manufactureres website which shows the full performance of the cake, then using this video to list out the effects and extract the rise time of the shots as well as the delay times between shots. My own procedure involves writing out a short-hand description of each unique effect and assigning a letter to it, then using the letters to notate the shot sequence. Once the shot sequence is constructed in the cake editor, the final step is to assign the delay values for each shot. This is easiest to do using the Time Drop Recorder utility on the List View, which allows you to start a recording session in which pressing the space bar will record the fire time for the next shot in the sequence. Using this method you simply start the recoroding session and then start the video, then hit the space bar each time a shot or sequence is fired until the video completes. More on this procedurue will be described below.
The best way to illustrate how to build cakes in the Cake Editor would be to walk you through the construction of a few real consumer cake items. So for our first example we will be building the cake Ghost Rider, which is a nine shot cake sold by World Class Fireworks. This is a basic ABC pattern that repeats three times, with each shot including a single shell along with a mine fired at the same time. So first a description is created from the video which would look like this:
Effect List
A) mine: red strobe
B) shell: silver brocade to red
C) mine: white strobe
D) shell: silver brocade to green
E) mine: silver popcorn
F) shell: silver brocade to blue
Shot Sequence
AB, CD, EF
AB, CD, EF
AB, CD, EF
Grid Settings
After determining the shot sequence, the next step is to setup the grid layout in the Grid View tab. While there can be any number of ways to lay out any given cake, it is best to try and match the layout to the actual layout used in the real cake. This will allow you to select entire rows or columns in the most efficient way when building the cake. For a nine shot cake such as the one in our example, a grid arrangement of three by three makes the most sense. Note that because this particular cake is shooting both a mine and a shell at the same time, each shot will actually be a pair of tubes— one for the mine and one for the shell. While it is also possible to just create a shell in the Shell Editor that also fires a mine when it shoots in order to contain both effects as a single item, the best practice is to use separate items fired from separate tubes. This is done because it will reduce the number of effects stored in the database and make reusing effects easier. For example, if you have three color mines and then three different color break shells, there are actually 27 different mine-shell combinations plus six stand alone effects for a total of 33 possible effects using only six effects. To do the same thing using mine/shell combination effects would require 27 individual effects to be created. With such a large variety of shells and mines used in the real cakes, you can see how combo effects would balloon into a huge number when trying to combine them into single effects.
Thus our nine shot cake is best organized into two shot pairs, so you would have three rows containing six columns each. The grid setting is then set to 3 x 6 and then the Set button is clicked to regenerate the grid.
Grid View vs. List View
There are actually two ways to view the data that makes up a cake. The list view shows the shot sequence as a script which can be sorted by clicking on the column headers, while the grid view shows a graphical representation of the cake that is usually faster to work with when designing the cake. The list view can be useful for viewing the actual shot firing order on complex cakes, but in most cases you will probably want to work in the grid view.
In the grid view, each cell in the grid represents a single mortar that will shoot a single effect. The capital letter can be cross referenced to the effect list to see what effect is assigned to that mortar. Below the effect letter in green text is the time delay value that represents the delay that will elapse before moving to the next effect. The firing angle is displayed at the bottom in red, with an angle indicator to show which direction the angle refers to. A value of zero indicates that the shot is fired straight up. A sequence arrow indicates which shot will come next in the sequence.
The mouse can be used to select single cells in the grid, and also drag-select multiple blocks of cells. Clicking the upper left corner of the label margin will select all shots in the entire cake, while selecting the row or column numbers will select all shots in the corresponding row or column.
Page 1
|
|

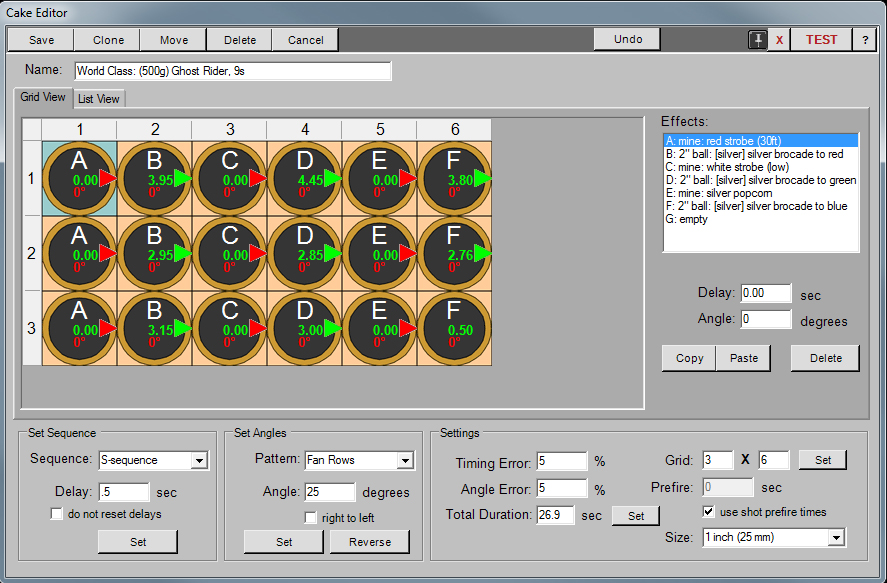
Figure 1:
The cake editor in Grid View.
Figure 1:
The cake editor in Grid View.
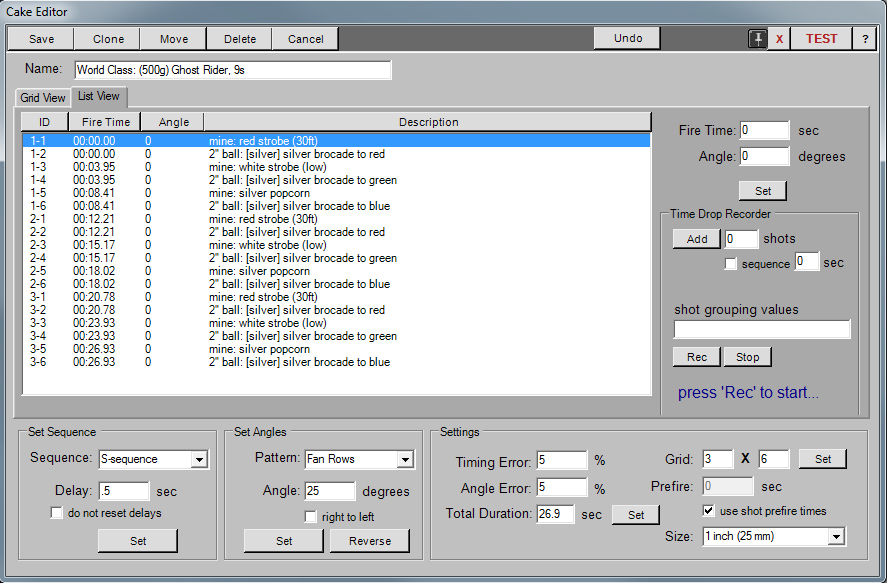
Figure 2:
The cake editor in List View.
Figure 2:
The cake editor in List View.
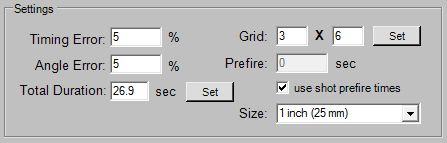
Figure 3:
Grid settings for three rows of six shots each.
Figure 3:
Grid settings for three rows of six shots each.
|
|