When ShowSim is first started, the Show Manager screen is automatically opened as the starting point. All shows that are stored in the database are accessed via this panel, rather than loaded directly from disk. Because all ShowSim data is stored in a single database file, there is no need to work with separate data files on your hard drive for each show. The Show Manager, seen in Figure 2, allows you to quickly browse all of your shows without parsing through file directories trying to find the right show. Clicking on any show in the list will give you a quick summary of show data as well, complete with shell count, cue count and duration. You can then double click on that show to open it, or alternately click the Open button.
File Browsing Mode
While being able to access all your shows instantly from your database is fast and convenient, there are times when you will also want to archive your shows to your hard drive and then delete them from the database. The reason for doing so is that if you store too many shows or even a dozen very large shows in the database, there will be an increasingly long delay when you go to open one of these shows. This is because the data for each show must be pulled from the sum total of all data from all shows, and the more data there is to sort through then the longer it will take the computer to do it. So the best practice is to only keep the shows you are currently working on in your database and then archive the completed project to disk as .sho files (the native showsim format for storing shows as text files).
There is a checkbox called “Browse Show Files in Folder” that is used to switch the Show Manager from database viewing mode to a file viewing mode. The text box below this option is used to specify the folder on your hard drive to examine. In Figure 3 the backup folder that contains files for all the shows that come installed with showsim is being examined. The show names are actually pulled from the show files, which helps when browsing backup folders since the file names just have numbers and you really can’t tell which shows they represent. The file name is still displayed in the information area however. When you find the show you are looking for and need to open it in ShowSim, you must first select it and then click the Import button in order to load the show back into the ShowSim database. After it is loaded you then uncheck the file browsing option to return back to the regular database view and open the show in the normal way.
Opening a Show
To open a show, you must first select it in the listing of shows and then click the Open button below the list. You can also double-click directly on the show name in the list to open it. Once the show has been opened, the Time Line, Cue Editor and Effect Browser will automatically load with the show. The show can then be played by using the playback control buttons on either the Time Line window or on the control bar at the bottom of the main screen.
Creating a New Show
Selecting the New button will open the setup panel for creating a new show. This is the same as clicking the New button on the button bar. For more information about setting up a new show, see the articles under the Show Setup section.
Importing a Show
The Import button will bring up the show import utility, which can be used to import a variety of show formats used by other programs in addition to the native .sho file format. Imported data is converted into a new show that is stored in the database and made available in the Show Manager. For more information about importing shows, refer to the Importing Shows article.
Exporting a Show
The Export button will bring up the show export utility, which can be used to output your show in a variety of formats that can be loaded into commercial firing systems or other choreography software programs. Shows can also be exported in the native ShowSim .sho format as a way of backing up your shows to disk or sending them to other ShowSim users. Exported .sho files can be Imported back into ShowSim and is the only format that will preserve all show data when transferring between computers. For more information about exporting shows, refer to the Exporting Show Data article.
Cloning a Show
The Clone button will make an exact copy of whatever show is selected in the show list. This is useful if you want to make a slightly altered version of an existing show, perhaps to present several designs proposals to a client. Clone can also come in handy as a way of viewing the same show from a different perspective or distance. Simply change the background image and firing position locations on the cloned show and you can create different views of the same show. However, once a show is cloned it is completely separate from the original show, thus changes in the original show will not be carried over to the clone.
Deleting a Show
The Delete button will permanently remove a show from the database. A backup of the show will automatically be created in the installation folder in case you accidentally delete a show that you did not intend to without first backing it up. You would have to find this backup and import it to get the show back in the event of an accident. A warning message will give you a chance to back out of this operation if you accidentally click Delete while trying to click one of the other buttons. It is recommended that you still export any show you wish to delete into a .sho file before removing it, that way you have control over the file name and where it gets stored.
Page 1
|
|

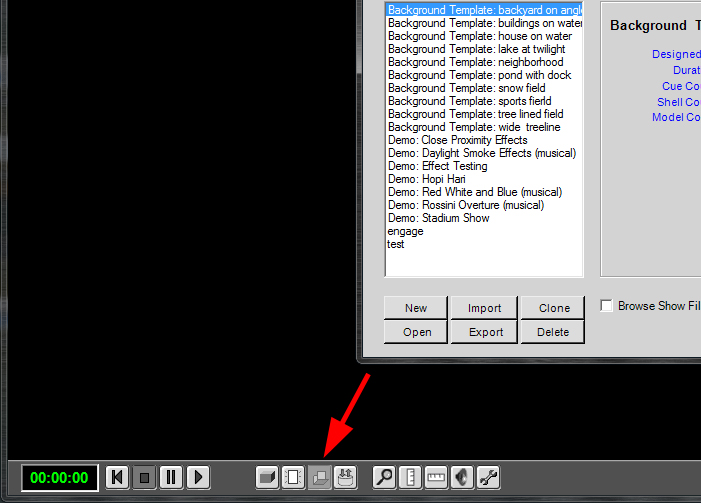
Figure 1:
The button on the main button bar used to access the Show Manager.
Figure 1:
The button on the main button bar used to access the Show Manager.
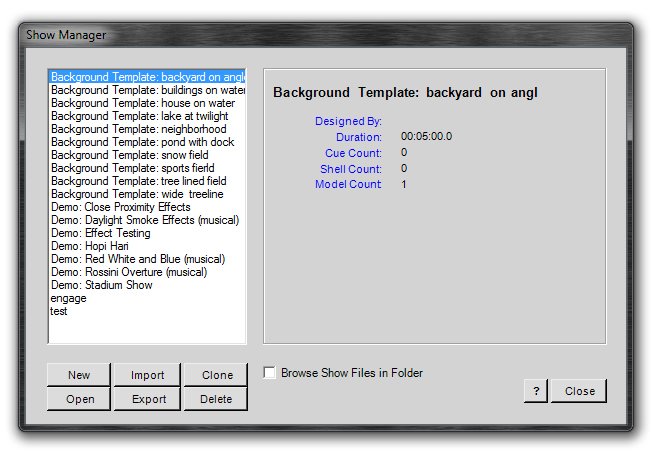
Figure 2:
The Show Manager showing a listing of all shows currently stored in the database.
Figure 2:
The Show Manager showing a listing of all shows currently stored in the database.
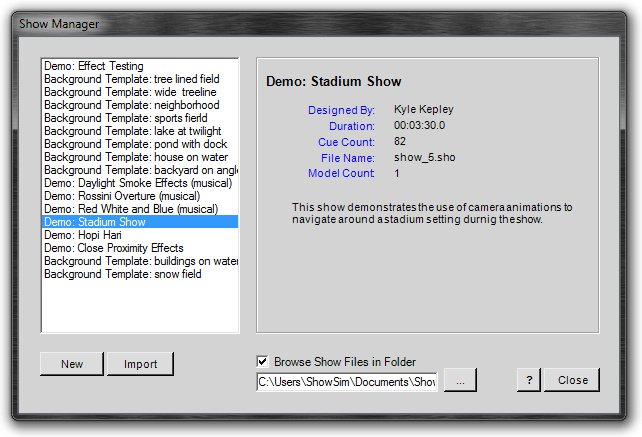
Figure 3:
The Show Manager in file browsing mode.
Figure 3:
The Show Manager in file browsing mode.
|
|